Sprue Cutter's Union #27: Photo Finish

I don't have a fancy photo area or process. The thing I wind up telling people most often about their miniature pictures is to change the settings on their camera! Here's the "materials" breakdown on my simple setup:
 |
| Where the "magic" happens! |
-Camera. Canon PowerShot A630 received as a gift six years ago now. With the right settings, it's fantastic. The removable SD card makes getting pictures onto my computer really easy because I can just pop the card straight into my computer, drag and drop. For work in progress pictures I use my phone, a Nexus 4, because it's a lot quicker. However, it leaves much to be desired in terms of quality, lack of a macro function, and ability to tweak the settings.

-Some sort of backdrop. I used to use white/off-white paper for the longest time. I do have this piece of bendableish black foam that, in my opinion, is a lot nicer. See for yourself...
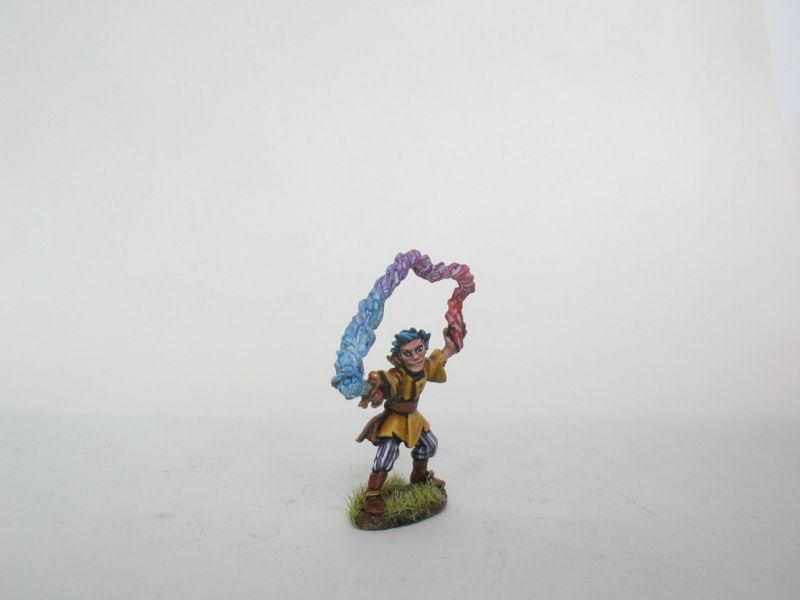
 |
| Same model, Reaper's Gnome Rogue, same camera, but different background. I prefer the black background so much more. Some folks use a white/blue gradient background. Try these, for funsies! |
As mentioned before, your camera settings can make all the difference in the world. Here are mine in the Manual mode on my camera:
- ISO 80. Low as she goes. This reduces the "noise" of your picture, but you'll need to compensate for the lower brightness by increasing your exposure.
- Auto White Balance (AWB): Fluorescent. If I take pictures in daylight, this gets changed to Daylight; if I use a regular incandescent then this setting is changed to Tungsten. This is vital and cannot be stressed enough.
- Picture size: "Fine", which equates to 2048x1536. It's a good compromise for my SD card and quality. I haven't noticed any benefit to going higher.
- Shutter Speed: 0.6", or 6/10 of a second. This is something specific to my setup. I'm lucky in that this speed is enough to get enough brightness on the picture that editing/"enhancing" isn't necessary, and my shaky hands don't ruin the picture consistently.
- f/stop: 8.0. High as she goes. Also known as aperture, a low setting puts the center of the picture in focus while leaving the focus everywhere else in the picture to be desired. Raise this value up and you'll have solid, consistent focus throughout your picture.
Non-setting tips:
- Use your macro setting! The symbol for it looks like a flower. This'll let you get up close and personal with your miniatures.
- Don't use the flash! Add more light that isn't the flash or increase your shutter speed. If you have problems with your pictures coming out blurry, use a tripod and a delay timer.
- Don't use the zoom! Not even the mechanical zoom, nevermind the optical zoom. The macro setting lets you get close; there's no need for a zoom!
Hopefully that covers it all. If not leave a comment! I'll be editing in a list of other SPU members as they post.


Comments
Post a Comment